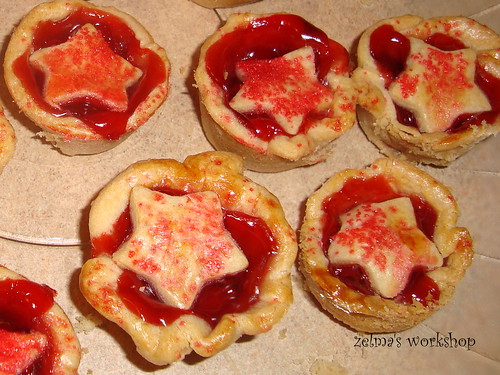
There are 2 changes that I made to the original post:
- This recipe uses homemade cherry filling, and I vow to someday make it, but I used canned cherry filling and it still worked great!
- The instructions call for regular cupcake tins, but since I wanted finger food, I made it in mini-cupcake tins, and they looked super cute!
[caption id="" align="aligncenter" width="500" caption="This is my version, don't they look cute?"]
 [/caption]
Here’s the recipe so you can try it out for yourself. You can also find the original blog post and pic here.
Cherry Pie Cups
1 package of ready-made pie crusts (or make homemade)
FILLING: (I used canned, but this filling looks delicious!)
2½ cups pitted & halved fresh cherries (about ¾ lb.)
2 Tbsp white granulated sugar
1 Tbsp finely grated lemon zest
1 Tbsp fresh lemon juice
1 Tbsp cornstarch
¼ tsp salt
EGG WASH:
1 large egg yolk
2 Tbs milk or cream
TOP:
coarse grain sugar (I used red sprinkling sugar cause they matched!)
DIRECTIONS:
1. Preheat oven to 350 degrees F. Spray 8 muffin cups with nonstick spray.
2. Roll out ready made pie crust until it’s a bit thinner. Use a plastic tupperware-type bowl as your “cutter” to cut out 5-inch rounds. You should be able to cut out 8 rounds from a package of pie crust (re-roll scraps, if needed). Line 8 muffin cups with the rounds, pressing in lightly.
3. Place filling ingredients in a medium bowl and toss. Scoop into crust-lined cups.
4. With leftover pie crust scraps, cut out decor for the tops of the pie cups- stars, stripes, whatever you’d like… be creative! Then crimp the edges of the pie cups.
5. Brush them lightly with egg wash, and sprinkle with sugar- the chunky, sparkly kind of sugar if you have it.
6. Bake 15 to 20 minutes (watch closely since baking time will depend upon how thinly you’ve rolled your crust). Cover lightly with foil during baking if they’re browning too quickly. They should be lightly browned (like the photo above) with the filling slightly bubbly.
7. Remove from oven and let cool for 15 minutes. Remove to a wire rack and cool completely (or serve warm). Serve with whipped cream and blueberries, if desired.
Many thanks to Recipe Girl for the great recipe!

No comments:
Post a Comment